photo AboutMe_zps05d961f1.png  photo Home_zps8c964101.png  photo Giveaways_zpsb44808d3.png  photo ContactMe_zpsfb4ba38f.png
Showing posts with label freehand. Show all posts

Thursday, March 14, 2013

Galaxy Nails

Hi again, LacquerHeads!

After I did the swatches for the Nicole by OPI Selena Gomez - Heavenly Angel post, it dawned on me that those nifty little flakies could potentially be a radass background for a killer Galaxy Mani. So, naturally - I tried it.

I started off with Sinful Colors - Black on Black as my base color. On top of that, I slapped on a thin layer of China Glaze - Some Like it Haute. Then, I sponged on my galaxies and nebulas using a billion different polishes including: Color Show - Fierce N Tangy & Pink Shock; Sinful Colors - CinderellaDream OnHappy Ending; Cherimoya matte.n.a - MatineeHollywood; Pure Ice - Hot Tamale, Celestial; Icing - Pomegranate Martini; and two unnamed polishes of unknown brands in shades of shimmery red.

Yes, you read that right - I used every single one of those colors at least once (but mostly more). That's part of what makes doing galaxy mani's so damn fun to do. All the layers of color creates so much depth and they end up being crazy cool to stare at all day when you're all done.

Then, on top of all 14 of those polishes - I hand placed some flakes of Nicole by OPI Selena Gomez - Heavenly Angel (sheeeesh that's such a long name!) wherever I wanted them. To finish it off, threw on a generous layer of China Glaze - Fairy Dust and when that dried I slapped on a topcoat of Butter London - Hardwear and BAM! done.

Wanna see the results? Of course you do!


I had the hardest time getting good pictures. My right hand looked a thousand times better than my left hand for once. It's usually the other way around, but this time I had to hold the camera steady and in focus with my non dominant left hand. And let me tell you, that was a horrible pain in the ass. It took me forever, and even then I just could not capture the flakies in the background, no matter how hard I tried.


Here's a couple snapshots all blurred out to show off the gorgeous holographic sparkle of Fairy Dust


So after many failed attempts at a quality picture, I took a break. I sat down, cracked open a Monster, and tried to just chill. I looked down at my hands and what do I see? All of the polish from my pointer and middle finger is just gone. Poof! Disappeared! What happened you ask? I have no idea. I do have one theory, however. I think it was this new base coat I tried out. It must have just popped all the polish cleanly off like it were a base of Elmer's Glue or something. Super lame. After that, I decided to continue trying to capture a picture of those awesome flakes anyway, and I got em! Right away! Check it!


I'm diggin' it! I really liked what the flakies added to it. What do you think? I'd love to hear your feedback, and I'd also love to see your take on a Galaxy Mani so if you'd like to share, please do!

Until next time,
prettylittlebigle out.

Tuesday, March 12, 2013

Selena Gomez's Nicole by OPI - Heavenly Angel

Hey there, LacquerHeads! 

I recently picked up a bottle of the new Selena Gomez Nicole by OPI - Heavenly Angel. It's a gorgeous opalescent flakie in a clear base. 


Here it is over black, grey, and white:


I think it looks best over black, but white is pretty interesting looking too.

I chose to put it on top of Don't Mess With OPI for a fun St. Patricks Day mani.


I really can't tell if I like it or not. I keep catching myself staring at it, because it really is eye catching. The multi colored glints of light reflecting from each little flakie is stunning, but I can't tell if it's cool looking overall or just tacky. I received two comments while wearing this mani. One person said it was weird, and another person told me they thought it was amazing.

As for the formula - I'm not so sure about this either. If you choose to put two coats on - the second coat will pull all the flakies up, and clump on top of the first coat of flakies. This makes some parts of your nail still totally void of flakes and other parts over packed. I did find a solution though, instead of applying in strokes, dab it onto your nails. This gives you better control of where the flakes will go, and eliminates the flakes pulling towards the tip and piling onto other layers. 

Since I can't decide if I'm completely in love with this or not, will you guys help me decide? I'd love to hear about your experiences using this polish and I'd love to see pictures of the outcome! So please share with me.

Until next time,
prettylittlebigle out.

Sunday, March 3, 2013

Spongeless Gradient, Tiger Stripe Nail Tutorial

What's up, lacquer heads?!


Prettylittlebigle here, bringing you a whole bunch of firsts. This is my first blog post, my first tutorial, and my first attempt at tiger stripe nails. I figured if I was going to start a nail art blog, then I might as well jump straight into the good stuff - tips first!

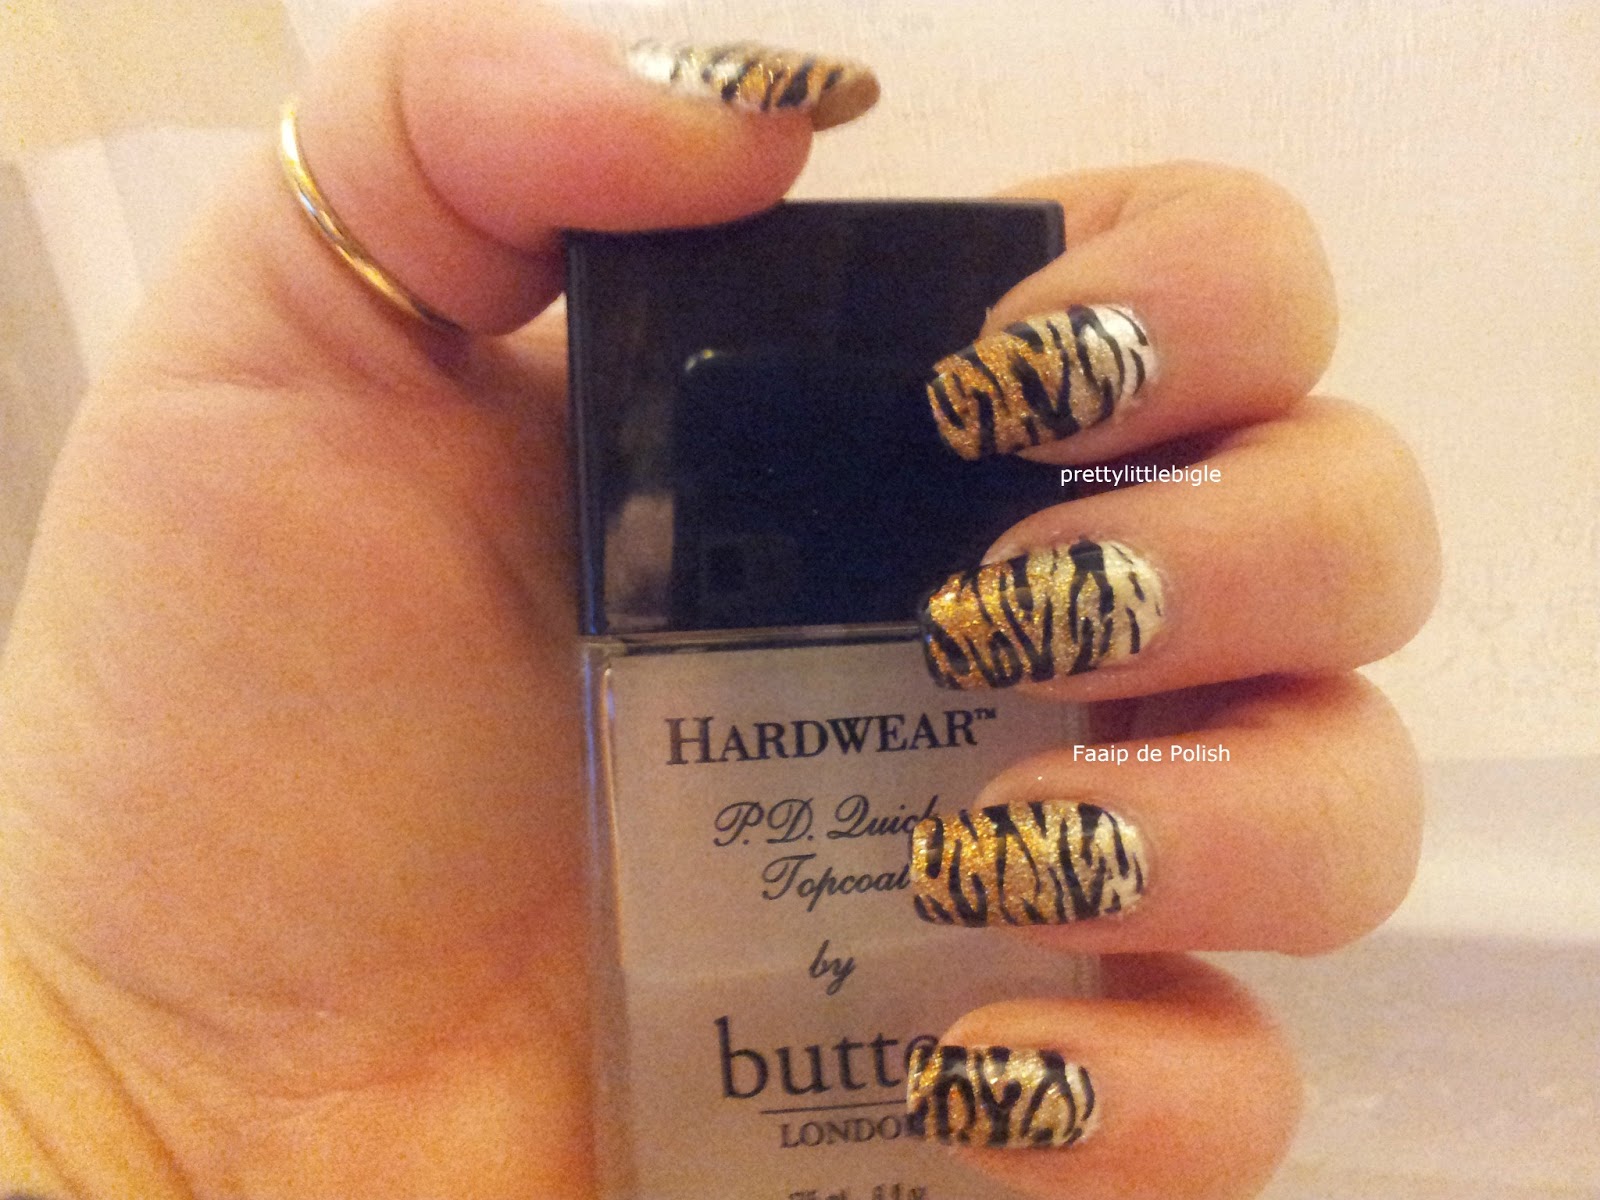
Here's the look we'll be re-creating today: A sponge-less gradient, tiger stripe manicure

I know, I know... looks kinda hard right? At least that's what I always thought. I have stayed away from animal print nails because they are sort of daunting. I thought they'd be way too difficult to do, but trust me - they're not! They're super easy, and the outcome is beautiful. So come on, what do you say? Let's try it!!

Here are the polishes I used:

From L to R: Essie - Protein Base Coat, Orly - Pointe Blanche, Orly- Winter Wonderland, China Glaze - I'm Not Lion, China Glaze - I Herd That, Sinful Colors - Black On Black, butterLONDON - Hardwear

You don't have to use these colors if you don't want. Do you wanna do a rainbow tiger stripe? Go for it! You rock the shit outta that rainbow tiger! It's all up to you, they're your nails and this is about your style right? So pick out three colors for the gradient, one color for the stripes. a base coat, and a topcoat.

You'll also need some tools:


Here's all of the tools that I used:


Now that you've gathered everything you need, go ahead and set up your work space. Make sure all of your polishes and tools are easily accessible so you won't smudge any wet polish when it comes time for them. Also make sure you've got some good lighting. Maybe someone can create a cute mani in the dark, but I sure can't.

Step One:
Always, always prep your nails and cuticles first! We all know how important nail care is right? Of course! The first thing I do is remove all polish from a previous mani, if any (and there always is). Then it's on to filing, cuticle removing, some good ol' vitamin E, and my favorite protein base coat by Essie.


Maybe I'll do a tutorial that takes you through the steps of that routine in the future, but for now it's on to step two.

Step Two:
Paint your nails with one layer of white polish and let dry completely. You can use any white ya like, I went with Orly French Tip in Pointe Blanche.


I wouldn't necessarily recommend this particular one because it's a bit harder to apply as an all-over color, due the thinner brush... buuuuuut it was all I had so... Moving along now.

Step Three:
Using
Orly - Winter Wonderland, you can either paint a stripe from the base of your nail to about one third of the way up, like I did, or just slap it on all over. Either way, the effect will be the same but only for this one step. I just wanted the white part of this gradient to be packed full of glitter like the other two colors are instead of leaving it plain white. When you're done, let it dry completely.


Step Four:
Starting at about one third of the way up your nail, paint one coat of
China Glaze - I'm Not Lion in a rough stripe in the middle of your nail. We aren't going for straight lines here, we want to try and blend this in with the edges of the white and have it be thicker and more opaque in the middle. Don't cover up all of the white!! Let it dry.


I pulled some of the polish really thin up to the tips in some places, as long as it's thin that's okay. This will help with the gradient effect.

Step Five:
This is the same as step four, only using
China Glaze - I Herd That and making this stripe blend in with your second stripe, making your polish more opaque towards the tip. Let it dry.


Step Six:
Here's where this sponge-less gradient technique gets a little different. In an attempt to make each stripe blend in with the stripes next to it, repeat steps three through five. You want to overlap the edges of each stripe, I found this to be easiest by using my brush to dab the polish on where I wanted it, instead of stroke. This way I could use less polish to overlap previous stripes, and more polish on the part of the stripe that won't get overlapped.


Step Seven:
This part isn't a must-do, it's just a personal preference. At this point I like to put on a top coat. Since we used glitters for this, the finish is a lot more rough and I like having a smooth surface to paint the tiger stripes onto. You can use which ever top coat you want, I used butter LONDON - Hardwear P.D. Quick Topcoat. This stuff is seriously amazing and always makes my mani's last forever. Love it!

Step Eight:
Here's where things get really fun. It's time to add the tiger stripes! First thing's first, get out your paper plate or whatever surface you chose, (I used an old tupperware lid) and drop a few drops of the black polish onto the plate. Using a thin striper brush, drag just the tip through the paint, being sure to only get a small amount of the paint onto the brush. If the paint is too thick, you'll end up with stripes that are too thick and harder to work with. Keep it in mind that less is better, you can always add more but you can't take any away.


I like starting my stripes in the middle of the nail, that way I can do the biggest part of the pattern and then work all of the smaller stripes in around that. Starting from the very edge of the nail, drag your brush in a line toward the center. You'll want the line to be thicker at the edge, and thinner in the middle. Do this again on the opposite side of the nail. If you want, some of the stripes can be in almost a jagged 'v' shape, or sort of resemble little flames. After you get your first couple of stripes on, you'll start to see which spaces of the nail need a stripe. This part is all up to you, just make sure all of your stripes are in the same direction. They can be short or long, thick or thin, they can even stretch completely to the other side if you wish. Always alternate sides, this way it will make it easier to make the next line flow with the previous line.


When you're finished, be sure to let the stripes dry completely before your add a topcoat. If the stripes aren't fully dried, they'll smear and you'll be super bummed out that your gorgeous tiger stripes are all smudged, and ain't nobody got time for a re-do!!

I blurred this picture to show of the holo sparkle of the gradient!


Now it's time for clean up. Dip your small brush into acetone and clean up the edges of your nail. Remove any polish that got on your skin or cuticles. If you'd like, you can add some more cuticle oil or vitamin e - and you're done!

If you're anything like me, you'll be staring at these gorgeous digits non stop!

Thanks for stopping by and checking out my first blog post. I hope you enjoyed this tutorial, and had a lot of fun re-creating these awesome nails. 


Leave me comments and constructive criticism, letting me know how I did. Also feel free to share photos of your attempt at this look, I'd love to see how everyone's turned out!!

Until next time,
prettylittlebigle out.