


Prettylittlebigle here, bringing you a whole bunch of firsts. This is my first blog post, my first tutorial, and my first attempt at tiger stripe nails. I figured if I was going to start a nail art blog, then I might as well jump straight into the good stuff - tips first!
Here's the look we'll be re-creating today: A sponge-less gradient, tiger stripe manicure

I know, I know... looks kinda hard right? At least that's what I always thought. I have stayed away from animal print nails because they are sort of daunting. I thought they'd be way too difficult to do, but trust me - they're not! They're super easy, and the outcome is beautiful. So come on, what do you say? Let's try it!!
Here are the polishes I used:

From L to R: Essie - Protein Base Coat, Orly - Pointe Blanche, Orly- Winter Wonderland, China Glaze - I'm Not Lion, China Glaze - I Herd That, Sinful Colors - Black On Black, butterLONDON - Hardwear
You don't have to use these colors if you don't want. Do you wanna do a rainbow tiger stripe? Go for it! You rock the shit outta that rainbow tiger! It's all up to you, they're your nails and this is about your style right? So pick out three colors for the gradient, one color for the stripes. a base coat, and a topcoat.
You'll also need some tools:
- nail file I use crystal files, they're the best
- cuticle remover
- cuticle oil i like to pop open vitamin e softgels
- very thin striping brush
- small brush for clean-up this is the set of brushes I have
- tissue, paper towel, or old rag
- paper plate or some kind of surface to put your black polish on
- acetone or remover
Here's all of the tools that I used:

Now that you've gathered everything you need, go ahead and set up your work space. Make sure all of your polishes and tools are easily accessible so you won't smudge any wet polish when it comes time for them. Also make sure you've got some good lighting. Maybe someone can create a cute mani in the dark, but I sure can't.
Step One:
Always, always prep your nails and cuticles first! We all know how important nail care is right? Of course! The first thing I do is remove all polish from a previous mani, if any (and there always is). Then it's on to filing, cuticle removing, some good ol' vitamin E, and my favorite protein base coat by Essie.

Maybe I'll do a tutorial that takes you through the steps of that routine in the future, but for now it's on to step two.
Step Two:
Paint your nails with one layer of white polish and let dry completely. You can use any white ya like, I went with Orly French Tip in Pointe Blanche.

I wouldn't necessarily recommend this particular one because it's a bit harder to apply as an all-over color, due the thinner brush... buuuuuut it was all I had so... Moving along now.
Step Three:
Using Orly - Winter Wonderland, you can either paint a stripe from the base of your nail to about one third of the way up, like I did, or just slap it on all over. Either way, the effect will be the same but only for this one step. I just wanted the white part of this gradient to be packed full of glitter like the other two colors are instead of leaving it plain white. When you're done, let it dry completely.

Step Four:
Starting at about one third of the way up your nail, paint one coat of China Glaze - I'm Not Lion in a rough stripe in the middle of your nail. We aren't going for straight lines here, we want to try and blend this in with the edges of the white and have it be thicker and more opaque in the middle. Don't cover up all of the white!! Let it dry.

I pulled some of the polish really thin up to the tips in some places, as long as it's thin that's okay. This will help with the gradient effect.
Step Five:
This is the same as step four, only using China Glaze - I Herd That and making this stripe blend in with your second stripe, making your polish more opaque towards the tip. Let it dry.

Step Six:
Here's where this sponge-less gradient technique gets a little different. In an attempt to make each stripe blend in with the stripes next to it, repeat steps three through five. You want to overlap the edges of each stripe, I found this to be easiest by using my brush to dab the polish on where I wanted it, instead of stroke. This way I could use less polish to overlap previous stripes, and more polish on the part of the stripe that won't get overlapped.

Step Seven:
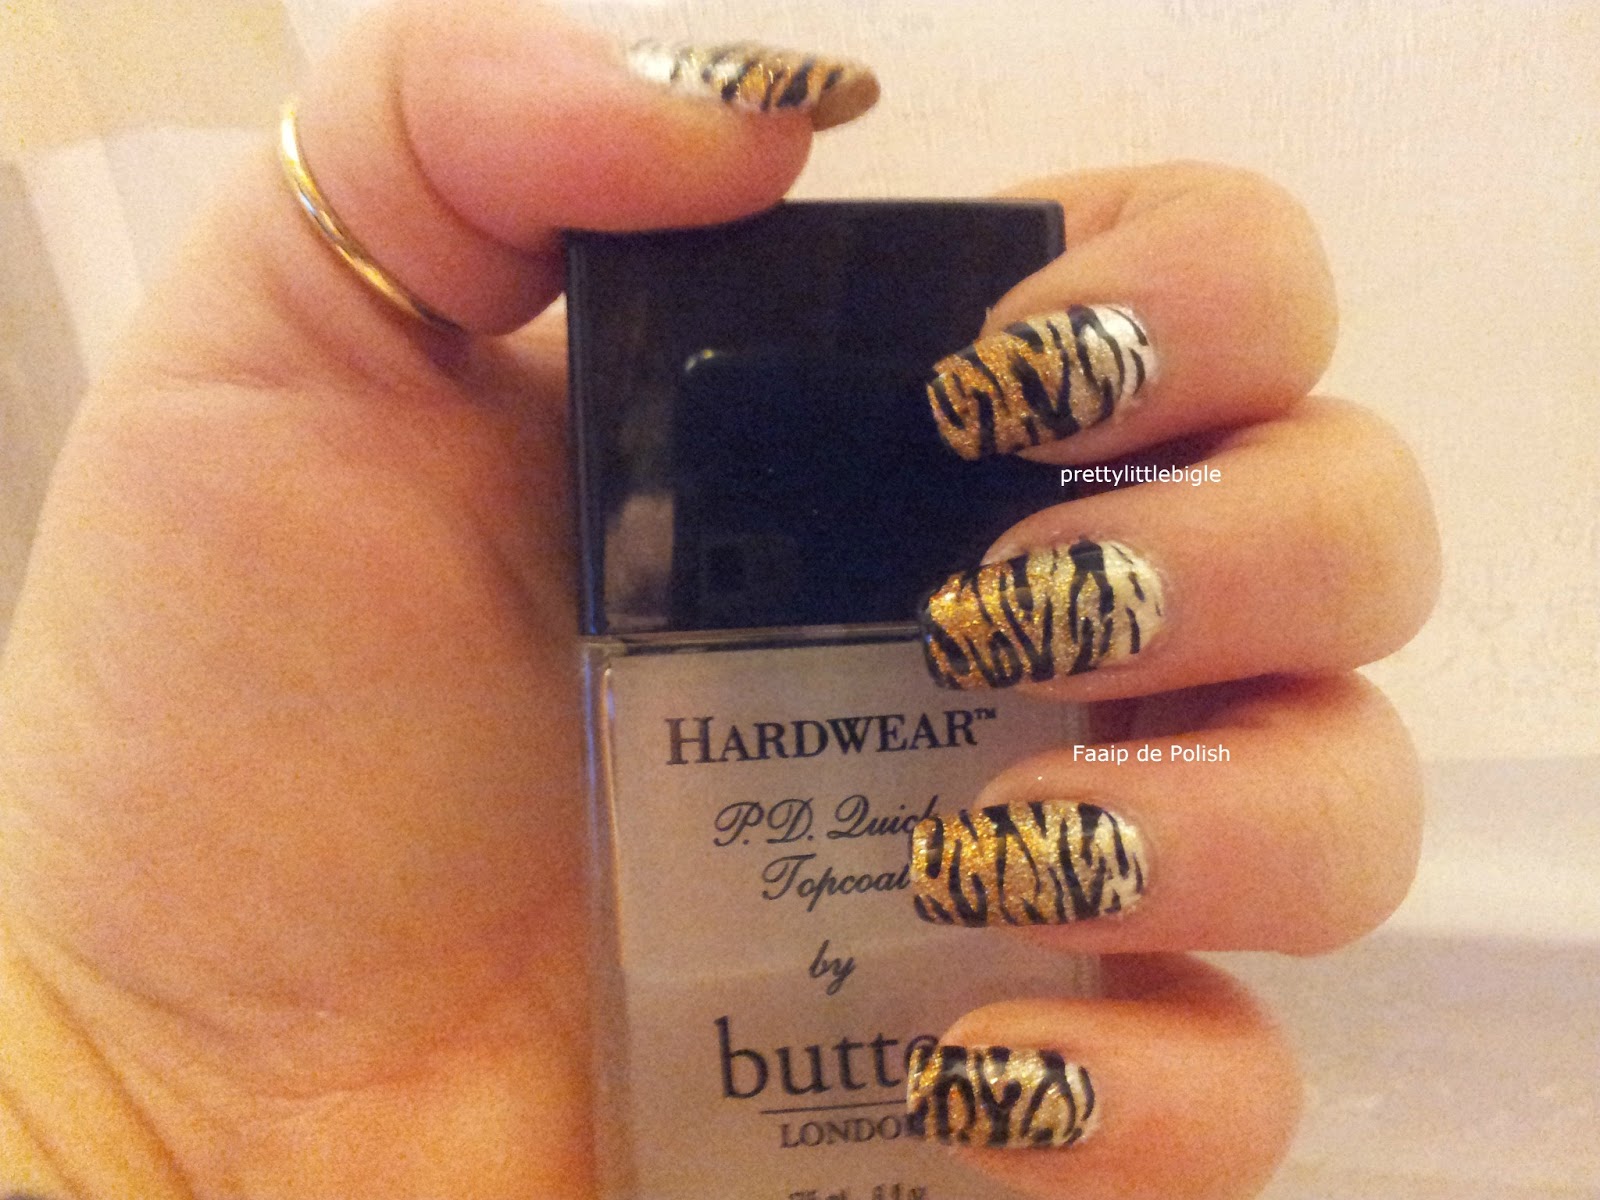
This part isn't a must-do, it's just a personal preference. At this point I like to put on a top coat. Since we used glitters for this, the finish is a lot more rough and I like having a smooth surface to paint the tiger stripes onto. You can use which ever top coat you want, I used butter LONDON - Hardwear P.D. Quick Topcoat. This stuff is seriously amazing and always makes my mani's last forever. Love it!
Step Eight:
Here's where things get really fun. It's time to add the tiger stripes! First thing's first, get out your paper plate or whatever surface you chose, (I used an old tupperware lid) and drop a few drops of the black polish onto the plate. Using a thin striper brush, drag just the tip through the paint, being sure to only get a small amount of the paint onto the brush. If the paint is too thick, you'll end up with stripes that are too thick and harder to work with. Keep it in mind that less is better, you can always add more but you can't take any away.

I like starting my stripes in the middle of the nail, that way I can do the biggest part of the pattern and then work all of the smaller stripes in around that. Starting from the very edge of the nail, drag your brush in a line toward the center. You'll want the line to be thicker at the edge, and thinner in the middle. Do this again on the opposite side of the nail. If you want, some of the stripes can be in almost a jagged 'v' shape, or sort of resemble little flames. After you get your first couple of stripes on, you'll start to see which spaces of the nail need a stripe. This part is all up to you, just make sure all of your stripes are in the same direction. They can be short or long, thick or thin, they can even stretch completely to the other side if you wish. Always alternate sides, this way it will make it easier to make the next line flow with the previous line.

When you're finished, be sure to let the stripes dry completely before your add a topcoat. If the stripes aren't fully dried, they'll smear and you'll be super bummed out that your gorgeous tiger stripes are all smudged, and ain't nobody got time for a re-do!!
I blurred this picture to show of the holo sparkle of the gradient!

Now it's time for clean up. Dip your small brush into acetone and clean up the edges of your nail. Remove any polish that got on your skin or cuticles. If you'd like, you can add some more cuticle oil or vitamin e - and you're done!
If you're anything like me, you'll be staring at these gorgeous digits non stop!
Thanks for stopping by and checking out my first blog post. I hope you enjoyed this tutorial, and had a lot of fun re-creating these awesome nails.
Leave me comments and constructive criticism, letting me know how I did. Also feel free to share photos of your attempt at this look, I'd love to see how everyone's turned out!!
Until next time,
prettylittlebigle out.
I have looked EVERYWHERE for a tutorial that showed the kind of tiger striping I saw in my head, and finally found this. THANK YOU so much, it actually looks like it's supposed to, and I think your gradient is a big part of that! :)
ReplyDeleteThank you so much for your comment! I stopped updating this blog months ago because it became too time consuming. I'm so glad to know that my tutorial has reached someone and that they appreciate it. You've restored my love for polish blogging!!
ReplyDelete